The Slow Erosion of Value
In my experience, this shift didn’t happen overnight. It’s been more like a slow drip — a constant lowering of the barrier to entry for users, paired with rising expectations for what should be freely available. Audiences have grown to want more for less, and that change has reshaped how we, as developers, build and deliver software.
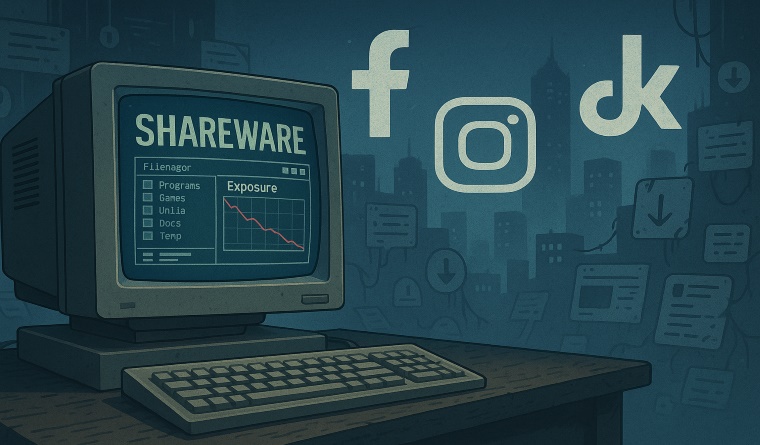
Back in the 2000s, we used to sell a cross-section of Windows applications. These were typically released as shareware — fully functional, but with some kind of limitation. Maybe it was time-limited, or perhaps certain features were locked behind a registration key. If the user found value in the software, they could unlock the full version. Simple. Fair.
At the time, a whole ecosystem of download sites existed to support this model. They acted as distribution hubs, allowing users to discover new software, try it out, and purchase it if it met their needs. It wasn’t perfect, but it worked. There was a clear value exchange: software solved a problem, and users paid for that solution.
This wasn’t about open source or a “free software” movement — it was about sustainable software distribution.
But then something started to change. Bit by bit, developers began offering more generous free editions, trimming fewer features, removing time limits, or even offering entire lite versions for free. Some split their products into different strands entirely — one version for casual users with basic needs, and a paid version for power users or professionals.
Some argue piracy pushed developers toward these new models — forced them to adapt. Instead of relying purely on software sales, revenue started shifting to alternative strategies: paid support, in-app advertising, bundled services, or, in more cynical cases, harvesting user data. Whatever the motivation, the result was the same: the perceived value of software continued to drop, and expectations shifted with it.
The Great Vanishing Act: Social Media and Search Engines
While developers were adjusting to the “race to free,” another tectonic shift was quietly unfolding: the collapse of discovery.
There was a time when building something useful and publishing it online gave you a decent chance of being seen. Early search engines, though far from perfect, prioritized relevance and freshness. Social media promised a new kind of reach — direct connection with users, fans, customers. For a while, it worked. A tweet, a blog post, a forum thread — these could ripple outward and find real people who cared.
That era is over.
Today, social platforms have devolved into throttled silos. You can have thousands of followers and still struggle to get a dozen views on a post unless you play the algorithm game — or pay to “boost” visibility. Engagement is driven not by merit, but by outrage, meme-ability, or timing. Even “communities” feel less like towns and more like haunted malls — full of recycled content, echo chambers, or silent scroll-bys.
Search engines aren’t any better. Try looking up a specific kind of software or development tool today, and you’re greeted by a wall of SEO-optimized garbage: faceless blog farms, AI-generated summaries, affiliate-heavy “Top 10” lists that have no real insight — just endless noise. Organic discovery has been buried under monetization and manipulation.
The irony? We’ve never had more content — more apps, more tools, more creativity online — yet reaching an actual human being with something honest and useful is harder than ever.
This has huge consequences for developers. Building the software is only half the battle now. You also need to master the dark art of content marketing, navigate shifting social trends, stay in the good graces of opaque algorithms, and somehow still find the energy to keep your codebase from collapsing under constant platform churn.
It’s exhausting. And it’s no wonder so many indie developers quietly disappear — not from lack of talent, but from a lack of reach.
The Distorted Value of Software
Software used to be seen as a product — a tool someone built, tested, and sold, like any crafted item. There was a clear sense of value: a developer solves a problem, and the user pays for that solution. Simple economics. But somewhere along the line, that model fractured. Platforms didn’t just disrupt the way software was distributed — they rewrote the rules of what people think software is worth.
Take mobile apps, for example. The rise of app stores introduced convenience and global reach, but also drove prices into the ground. Suddenly, developers were competing not just with other paid apps, but with free everything. To survive, many had to shift to freemium models — giving away core features and gating the rest. But the damage was already done: users were being trained to expect entire applications for nothing.
That expectation didn’t stay confined to mobile. Over time, it spread across platforms. “Free” became the standard — not because it made sense, but because the platforms that mediate access to users profit from volume, not value. Apple, Google, Meta, and others don’t care what your software costs — they care about engagement, data, and ad revenue. The more things people download and interact with, the better for them. Whether a developer gets paid is incidental.
This distortion leads to absurd outcomes. A user might spend $6 on a coffee without thinking twice, but scoff at a $3 app that took six months to build. They'll binge hours of free software reviews on YouTube — funded by ads — but balk at a one-time purchase that supports a real creator directly. In this environment, even a fair price feels like a violation of some unwritten rule: “It’s digital — why should I pay?”
And this is where the rabbit hole goes deepest: users have internalized the platform’s values. If it’s not free, it’s suspect. If it’s not viral, it’s invisible. The only way to “win” is to give away your work, and hope to monetize later — maybe through donations, maybe through volume, maybe through some yet-to-be-invented hustle.
But real software — thoughtful, original, and well-supported — takes time. It takes energy. And when its value is constantly questioned, or ignored altogether, the system doesn’t just fail developers — it fails users too. Because eventually, good software stops getting made. Or worse: it only gets made by companies whose real product is the user, not the tool.
Where Does This Leave Developers Now?
For developers — especially independents — the ground has never felt more unstable. The tools have improved, the platforms have multiplied, and the audience has grown — and yet, it’s never been harder to make a living from software.
The modern indie dev wears every hat: builder, tester, designer, marketer, customer support, social media presence, and content creator — all while contending with users who expect polished, cross-platform functionality for free. You can put in six months building something genuinely useful, only for it to be dismissed in five seconds because it’s not free, or not popular, or not ranking on some algorithmic feed.
Worse still, the platforms themselves offer no consistency. One week your app or tool goes semi-viral and you think, Maybe this is it. The next week, your reach vanishes. No explanation. No recourse. Just silence.
This is the new normal: developing in a vacuum, with no guarantee that effort equals outcome.
Some developers adapt by chasing virality. Others go niche, hoping to find a small but loyal user base. A few still cling to the old model of pay-once licensing, trying to educate users about the value behind what they’re getting. But increasingly, developers are being nudged — or forced — toward models that don’t prioritize craft or utility, but engagement: ads, subscriptions, bundles, data collection, or selling their soul to platform-specific ecosystems.
That’s not sustainability. That’s survival.
It’s a kind of slow-burn burnout that creeps in — not because the work is hard (it always was), but because the reward structure no longer makes sense. You create something valuable, but the market’s mechanisms for recognizing that value are broken. And when developers can’t even get feedback — can’t even get seen — the silence becomes louder than criticism.
Some quit. Some pivot. Some keep going, out of habit or hope. But nobody can honestly say the system is working for the people who build things anymore.
What Now?
I don’t know what the answer is — but it’s definitely not more of the same.
The landscape we once knew has eroded, almost imperceptibly, under our feet. Choice has been quietly stripped away. The transition from independent websites to the social media monoculture wasn’t just about convenience — it was a wholesale loss of autonomy. The old ecosystem — messy, diverse, and full of personality — gave way to a handful of centralized feeds where everything looks and feels the same.
And that’s the real tragedy: today, many developer sites aren’t homes anymore — they’re just link portals. Buttons to app stores. Embeds from Discord servers. A “community” reduced to comment threads in algorithm-driven silos. We used to build hubs that welcomed users in, that told a story, that taught people what the software was and who it was for. Now? You’re just funnelling people toward a store page and hoping they don’t bounce.
As more of those independent sites disappear, so does our collective presence. The ripple effect kills discoverability. Search engines become even more hollow — fewer developer-run pages, fewer backlinks, less context, less authority. Everyone gets drowned in noise, and only the biggest platforms benefit.
There is one thing we can do: keep our homes alive.
Keep your independent site up. Keep publishing. Keep documenting your software, your thought process, your updates — even if only a handful of people read it. Link to other indie devs you respect. Drive traffic toward them. Treat your site not just as a billboard, but as a hub — something living and worth revisiting.
It might not change the tide overnight. But every site that stays online is one more light in the dark — and if we’re going to rebuild anything, that’s where it starts.
💬 Join the Conversation
Have you noticed the shift in how people value software?
Are we losing more than just revenue in this age of “free”? I’d love to hear your thoughts.
Leave a comment below or reach out on X.com — let’s talk about where indie software goes from here.
If this article resonated with you, consider subscribing or exploring more posts on the changing landscape of software development and digital culture.


